Teachers Pay Teachers Instagram Facebook Pinterest Image Map

August 31, 2020

Germs and Fungus


Germs and Fungus! 
 This is always the second unit I do every year. I do it after my What is a Scientist? unit. I like to do this one at the beginning of the year because it teaches proper hand washing! 
I just updated this resource it is now DIGITAL and PRINTABLE! 


I alway start off this unit by reading two books. Click the book to find it on Amazon or click the video to hear it being read. 


Our favorite part of the unit, the experiment! This is always a hit! 
The only supplies you need for the experiment is hand sanitizer or lotion and glitter. 


Below is the experiment we do each year. If the kids can not touch hands they can touch different things in the classroom with the glitter hands and see how the glitter (germs) spread. If you are doing this virtually then the teacher could just do it, the kids could do it at home, or you can show the video found after the steps. 


Steps

1: Add glitter to the hand sanitizer bottle.

2. Give the first child a squirt and have them rub it in, I like to tell a quick, funny story. For example, Chris just went to the bathroom and didn’t wash his hands, he then gave Katie a high five.” Have Chris give Katie a high five. “OOOOOOO gross!” 

3. Continue with the next child. “Karla sneezed into her hands and then handed Stephen a pencil.” etc. 

4. Once everyone has glitter on their hands. I have one child try to just wipe it off and another to just wash it quickly with water. Then have another wash with soap and for 10-20 seconds. 

Which worked best? 

The glitter will only wash off if you wash your hands correctly. 

5. After the experiment we make hand washing steps to hang by our sink.

6. Finally, we make an anchor chart to describe ways to prevent the spread of germs, germs are bacteria and viruses,

 how to fight germs, etc.


Fungus Experiment
This is experiment is also located in my unit. This can be done in the classroom, with the teacher visually or the kids can do this at home. 


Video preview of what the digital unit includes! 


Click the link below to check out the unit :). 


July 22, 2020

What is a Scientist?


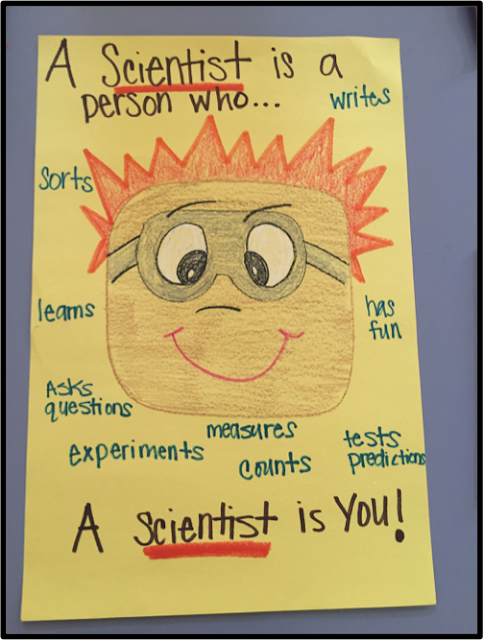
What is a Scientist? I use this unit to kick off my science every year. I use these actives wether I teach Kinder, 1st, 2nd or 3rd. I have used it on all four grades. I just have the students do more or less depending on the grade level or skill level. 


I always start off by reading the book, What is a Scientist by Barbara Lehn. 
Click the book to get it on Amazon. Or just watch the read aloud on YouTube.


Watch Max teach about a Scientist! 


Vocabulary 
Real Life Photos and illustrations available. 


Example Anchor Charts


Activities 


Also included are a close reading, mini books, comprehension questions and more activities. 


**EXCITING NEWS!! This unit is also available in digital! 
Check out the video preview below. 


March 18, 2020


Dear parents now homeschooling! 

I am a former public school teacher, but currently have been homeschooling my boys. We homeschool 4 days a week; Monday  Thursday from about 8am-12pm. This is the way that works best for their learning and allows me time to get what I need to do, done! I understand some may not agree, but hear me out. 

Parents that have now found themselves as their child’s teacher, do not need to worry about keeping the same hours as their public school hours. In case you are worried that you are not spending enough time on homeschool each day-think on thisa normal school day is about 7-8 hours. 
subtract about an  hour for lunch recess 
subtract about  an hour for specials times
subtract about an hour for hallway/transitions/bathroom breaks. 
Subtract about an hour for beginning and end of the day routine and students disrupting class.
NOW REMEMBER your public school teacher has to teach 20+ students! Your ratio is much, much smaller so you need a lot less time! 

You can still have a very successful student with only a couple hours each day! I also work part-time from home. I know many parents are juggling a full time job, house obligations and homeschool right now. Having a set schedule is going to be your best friend. A schedule is very important for you and your child! Pick a time that “school” will happen and stick to it. If you decide to be flexible with those hours, than your child will be more likely to take it less serious, think it might not happen, or try to avoid it. If our children know that M-F from 8-10 we do school work, no matter what; then they will start to expect it and things will go much smoother. Your children are smart and clever, do not let them call your bluff! 

A great point!:  A homeschool blogger Raising Arrows states, “ If the public school can count standing in the line at the water fountain as “school hours,” then I count children sorting the recycling as school hours. “ Make everything a learning opportunity. Cook with your kids, play games with kids, and give your kids chores. 

Here is an idea of a daily schedule. This will not work for everyone, but I can guarantee if you create and post some sort of visual schedule for your children it will help so much! Let them have a say in some of the time slots and know this can work for children of all ages. 

8-9: Breakfast and toons (parent work time)
9-11: “School time” (parent try to squeeze work in while the kids work)
11-12: Chore time  Listen to fun music and everyone help out
12-1: Lunch
1-2: Rest time/reading time (parent work time)
2-3: Educational website (parent work time)
3-4: Play outside (parent work time)
4-5: Kids choice or technology (parent work time) 

Ideas to make “school” more successful and fun.
Fun pens
Fun markers
Play music in the background
Bribe  
Snack for finished tasks
Timers
Let them run outside and ring the door bell after they finish each worksheet or activity this one makes them work fast, LOL!!
LIMIT ALL TECHNOLOGY until all schoolwork and chores are done for the day. 

This is going to suck sometimes for both your kids and youyou will yell, you will loose your patience, you may not understand the work the teacher sent home, you will finally sit down to do some work and someone will need their butt wiped but YOU got this! One of my friends said, “give yourself some grace.” With all you have on your plate right now, your kids are going to be fine! 

And remember to thank a teacher!

Grow Your Own Butterflies


🐛🦋 Last spring we decided to order our own Butterfly Lifecycle kit from Insect Lore on Amazon
🐛 🦋 The kit came with everything (even the caterpillars) and was super simple. BONUS! I was not at all grossed out! 


🐛 🦋 Below is everything that comes in the kit


🐛 🐛  We took pictures every few days to track our caterpillars and butterflies. 

🐛 🐛 Day 1 - super easy set up. Just had to put the jar of caterpillars (they are so tiny) in a cool, mostly shady place.
After about 7 days they will start to climb to the top of the cup to start the next process. 


🐛 🐛  Day 5 - They are growing! 
The caterpillars are eating and eating and getting bigger! 


🐛 🐛  Day 7 - They have made their way to the top and are starting to make their cocoon shape. 


🐛 🐛  Day 8 - Cocoons! 
This is so cool to watch and observe. 


🐛 🐛  Day 10 - Habitat time...time to move the cocoons to their habitat. 
They will hatch in about 7 days! 🦋


🦋🦋 Day 16 - Our butterflies have emerged, they are enjoying sugar water in their habitat. 
We will release them in a few days. 


🦋🦋 Day 22 - We released our Painted Lady Butterflies. 
We had the best time with this kit and will continue to do this every year! 


Get your own kit here


🦋 I created a FREEBIE to go along with growing butterflies. Just click the picture below to download! 
                   
🦋 Butterfly Words click below! 


🦋 We also oread a few books as our butterflies grew! 
Click on the book to check it out on Amazon.